
 6537
6537
Private browsing is a way for you to use the internet without leaving behind a local trail of history, passwords, cookies, and other assorted bits of information. While this doesn't prevent information you submit from being collected by Tech Services, our COS internet service provider, or the websites you visit, it can still be a useful tool if you want to log into the same site from different accounts (i.e. using your COS account in one window and browsing as a prospective student in another) or see the public view of a site you're logged into.
Every browser has their own name for private browsing, and while accessing it is accomplished in practically the same way, there can be subtle differences from product to product.
Google Chrome - Incognito Mode

At the top right of your Google Chrome window, select More
New Incognito window
.
You can use a keyboard shortcut:
- Windows, Linux, or Chrome OS: Press Ctrl + Shift + n.
- Mac: Press ⌘ + Shift + n.
Microsoft Edge: InPrivate Browsing
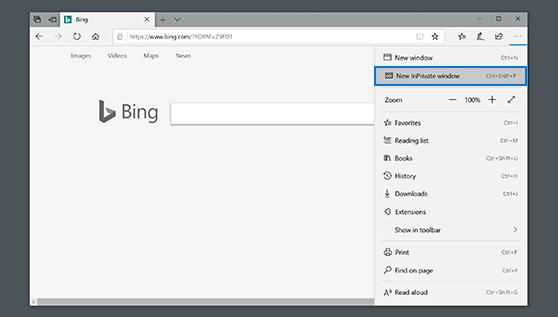
At the top right of your Microsoft Edge window, select More ![]()
New InPrivate window
![]() .
.
You can use a keyboard shortcut:
- Windows, Linux, or Chrome OS: Press Ctrl + Shift + n.
- Mac: Press ⌘ + Shift + n.
Safari (macOS): Private Browsing

With the Safari app open, go to the top left of your menu bar and choose File New Private Window
You can use a keyboard shortcut:
- Mac: Press ⌘ + Shift + n.

